Connect Migma to Claude Code or Claude Desktop through Remote MCP and browser OAuth, then prepare emails, audiences, campaigns, and reports from Claude.
Migma connects to Claude Code and Claude Desktop through Remote MCP
Connect Migma once, then use it from Claude Code or Claude Desktop to design branded emails, manage opted-in contacts, prepare campaigns, and read results. Browser OAuth handles access, so you do not paste an API key into Claude.
Both setup paths use Migma Remote MCP at https://migma.ai/mcp. Choose the section for the Claude app you use.
Copy this prompt into Claude Code or Claude Desktop:
Set up Migma so you can run my email marketing.Read https://docs.migma.ai/tutorials/connect-migma-to-claude-code and connect with full access. I'll approve in my browser.Then show me my brands and suggest what we should do first.
claude mcp add --scope user --transport http migma https://migma.ai/mcp
--scope user makes Migma available in every local Claude Code project for your user account. Use --scope local instead when you want it only in the current project.Confirm the saved configuration:
claude mcp get migma
Illustration of the Claude Code MCP setup command
2
Approve the connection
Start Claude Code, then enter:
/mcp
Choose Migma, select the authentication action, and follow the browser link. Sign in to Migma if needed.Review every requested permission before approving. email:send allows test and live sends. Keep Claude Code’s confirmation controls enabled and approve only when you trust the session to act for you.
Illustration of the Migma connection review step
Migma creates the scoped connection key automatically. No key needs to be copied into a command or chat.
3
See your account
Run /mcp again and confirm Migma shows as connected. Then ask:
Show my Migma context and suggest what we should do first.
Claude shows your workspaces, brands, plan, and sending domains, then suggests the first useful step.
Illustration of a connected Migma server showing account context
In a Claude conversation, click +, then choose Connectors → Add connector → Add custom connector.You can also open Customize → Connectors, click +, then choose Add custom connector.
Open Add custom connector in Claude Desktop
2
Add Migma
Enter:
Name:Migma
Remote MCP server URL:https://migma.ai/mcp
Leave OAuth Client ID and OAuth Client Secret empty. Keep individual sign-in enabled, then click Add.
Add Migma as a custom connector
3
Approve Migma access
Select Migma, click Connect, and follow the browser window. Sign in to Migma if needed.Review every requested permission before approving. email:send allows test and live sends. Approve only when you trust the Claude session to act for you.
Review and approve the Migma connection
4
Enable Migma in the conversation
Click + → Connectors, then turn on Migma. The connector should show as enabled in the current conversation.
Migma enabled in Claude Desktop
5
Send a first request
Start with a draft:
Create 3 email designs for our Shopify store Allbirds using Migma.Keep them as editable drafts and show me each preview.
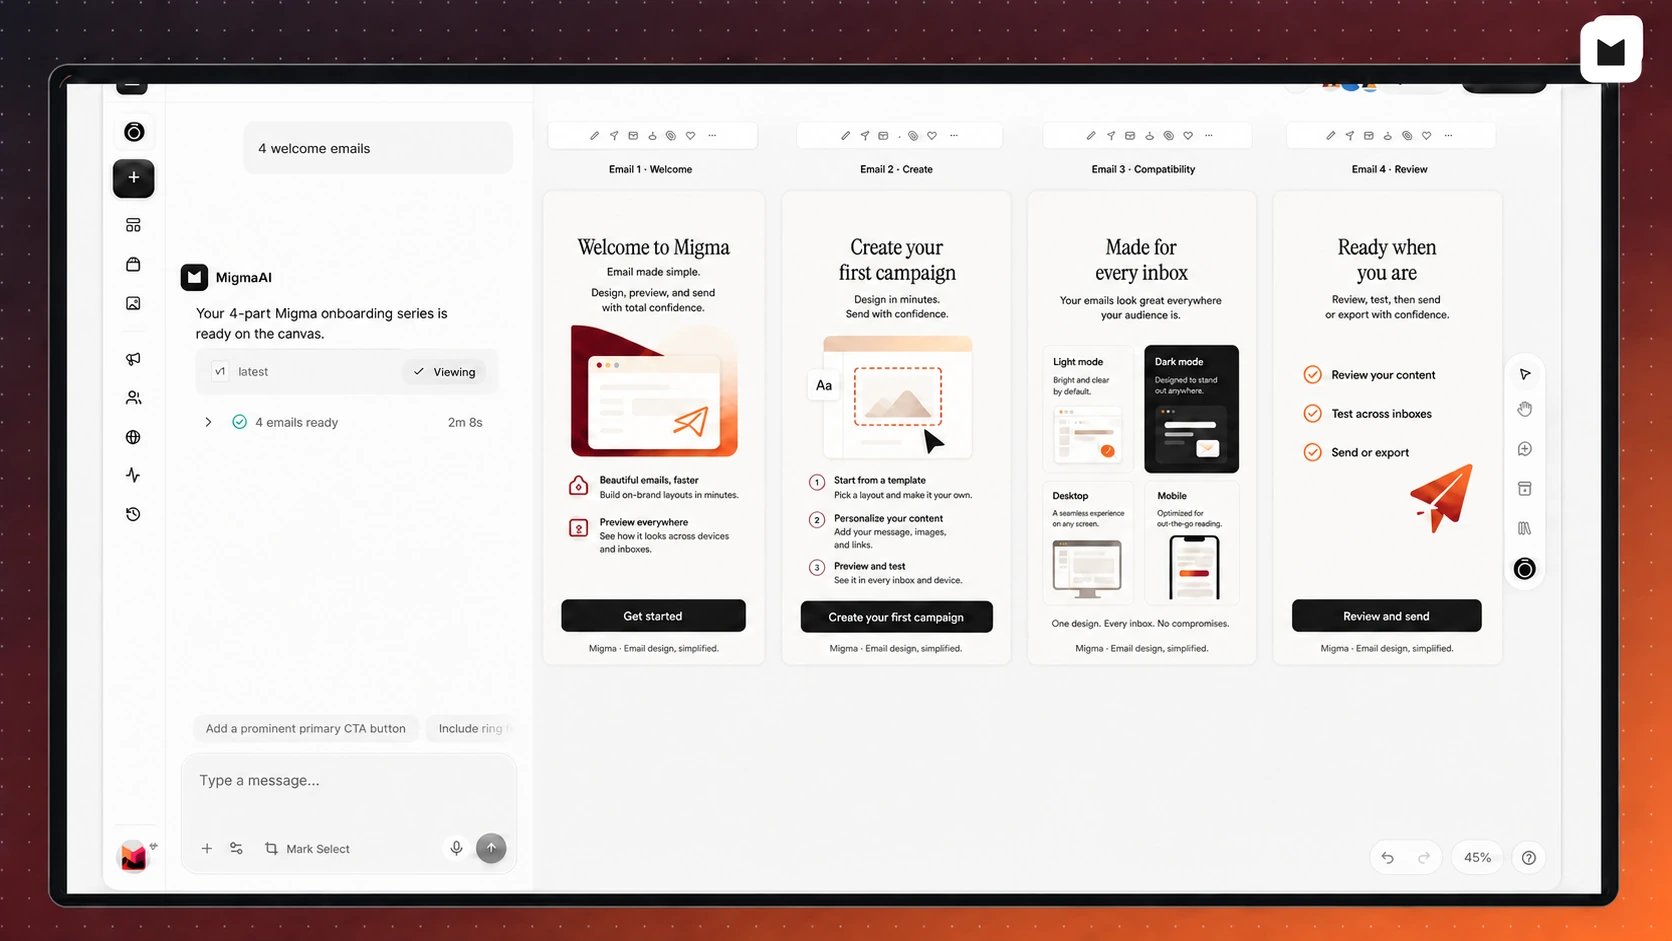
Claude can hand a complete email series back to the Migma canvas
On Claude Team or Enterprise, an organization owner may need to add the custom connector first. Each member then connects their own Migma account.
Ask Claude to list your brands and choose one. Every later Migma action needs that brand. If Claude asks for a project ID, that is the brand handle used by the API. For a new brand, ask Migma to import it from the website.
2
Save lasting brand facts
When you share tone, products, offers, policies, or FAQs that should persist, ask Claude to save them to the Migma knowledge base. Those facts improve later emails.
3
Design emails and show drafts first
Ask for one email or a short series. Claude should generate the work, wait until it is ready, then show preview images and canvas links. Open a canvas link for visual edits in Migma. Run compatibility, deliverability, or spam checks after you have reviewed the design.
4
Import or build the audience
Upload or paste an opted-in contact CSV and name the list. Ask Claude to use one contact import with the full CSV text. You can also create a segment from contacts already in Migma.
5
Confirm the sender
Campaigns need a sending domain and From address. Ask Claude to list your domains. If none are ready, set up a domain you own, buy one, or start with a managed Migma address. See Sending domains.
6
Check and prepare the campaign
After you approve a draft, ask for a test send, inbox checks, or a small edit. Then create a draft campaign with subject, sender, and recipients. Ask Claude to wait for approval before any live send or schedule. You can also finish launch in the Campaigns UI.
7
Read results
After sending, ask for campaign stats and delivery logs. Clicks are a stronger signal than opens. Use what worked to improve the next brief. See Track results.
Campaigns send one approved email to an audience. Use an email series when you need a connected sequence drafted together. See Campaigns vs series.
Use Migma for brand [name].Create one editable marketing email.Audience: [who]Goal: [what they should do]Facts only: [approved claims and URLs]One primary CTA. Do not invent metrics.Show preview images and the canvas link as soon as they are ready.Do not validate or send yet.
Use Migma for brand [name].Prepare a three-email onboarding series.Email 1: first valueEmail 2: remove setup frictionEmail 3: invite the next actionKeep them as editable drafts and show each preview when ready.
Save this to the Migma knowledge base for [brand]:We never invent discounts. Primary CTA is "Shop the collection".Tone is direct and short. Footer always includes shipping and returns.
Use Migma for brand [name].Import this CSV into a list named "[list name]".These contacts opted in on our site.Use one contact import with the full CSV text.Report created, updated, skipped, and failed counts.Do not convert the CSV to JSON contacts.
Send a test of email [email id] to me@company.com.
Use Migma for brand [name].Create a campaign draft from email [email id or canvas link].Recipients: list or segment [name].Subject: [subject]Sender: [from name / domain if known]Keep it in draft. Show recipient count, subject, and sender, then wait for my approval.
Use Migma. Show stats and recent delivery logs for campaign [name or id].Highlight opens, clicks, bounces, and complaints in plain language.
Run inbox checks only when you ask, or as a last step before send:
Run inbox checks for email [email id].Separate confirmed errors, warnings, and checks not available.Do not auto-fix. Recommend the smallest changes first.
Export instead of sending in Migma when the campaign lives in another email platform. Available formats and destinations include HTML, PNG, PDF, Klaviyo, Mailchimp, and HubSpot. See Export options.
Migma skills add guided workflows and setup instructions to Claude Code:
claude plugin marketplace add MigmaAI/migma-skillsclaude plugin install migma@migma-plugins
Run /reload-plugins inside Claude Code after installation. The plugin can also provide Migma MCP; Claude Code de-duplicates servers that point to the same endpoint.
For Claude Desktop, open Customize → Connectors, find Migma, and disconnect it.Removing the connector does not replace revocation. In Migma, open Settings → Developers → API Keys and revoke the Claude connection key. You can also clear authentication from Claude Code’s /mcp menu.