> ## Documentation Index
> Fetch the complete documentation index at: https://docs.migma.ai/llms.txt
> Use this file to discover all available pages before exploring further.
# Set up Migma in 2 Minutes
> Two-minute setup checklist for importing your brand, creating an email, and preparing to send.
Welcome! Let's get you sending your first email.
This page walks you through the six things you need to do in order. Skip around if you want, but doing them in sequence makes the most sense the first time through.
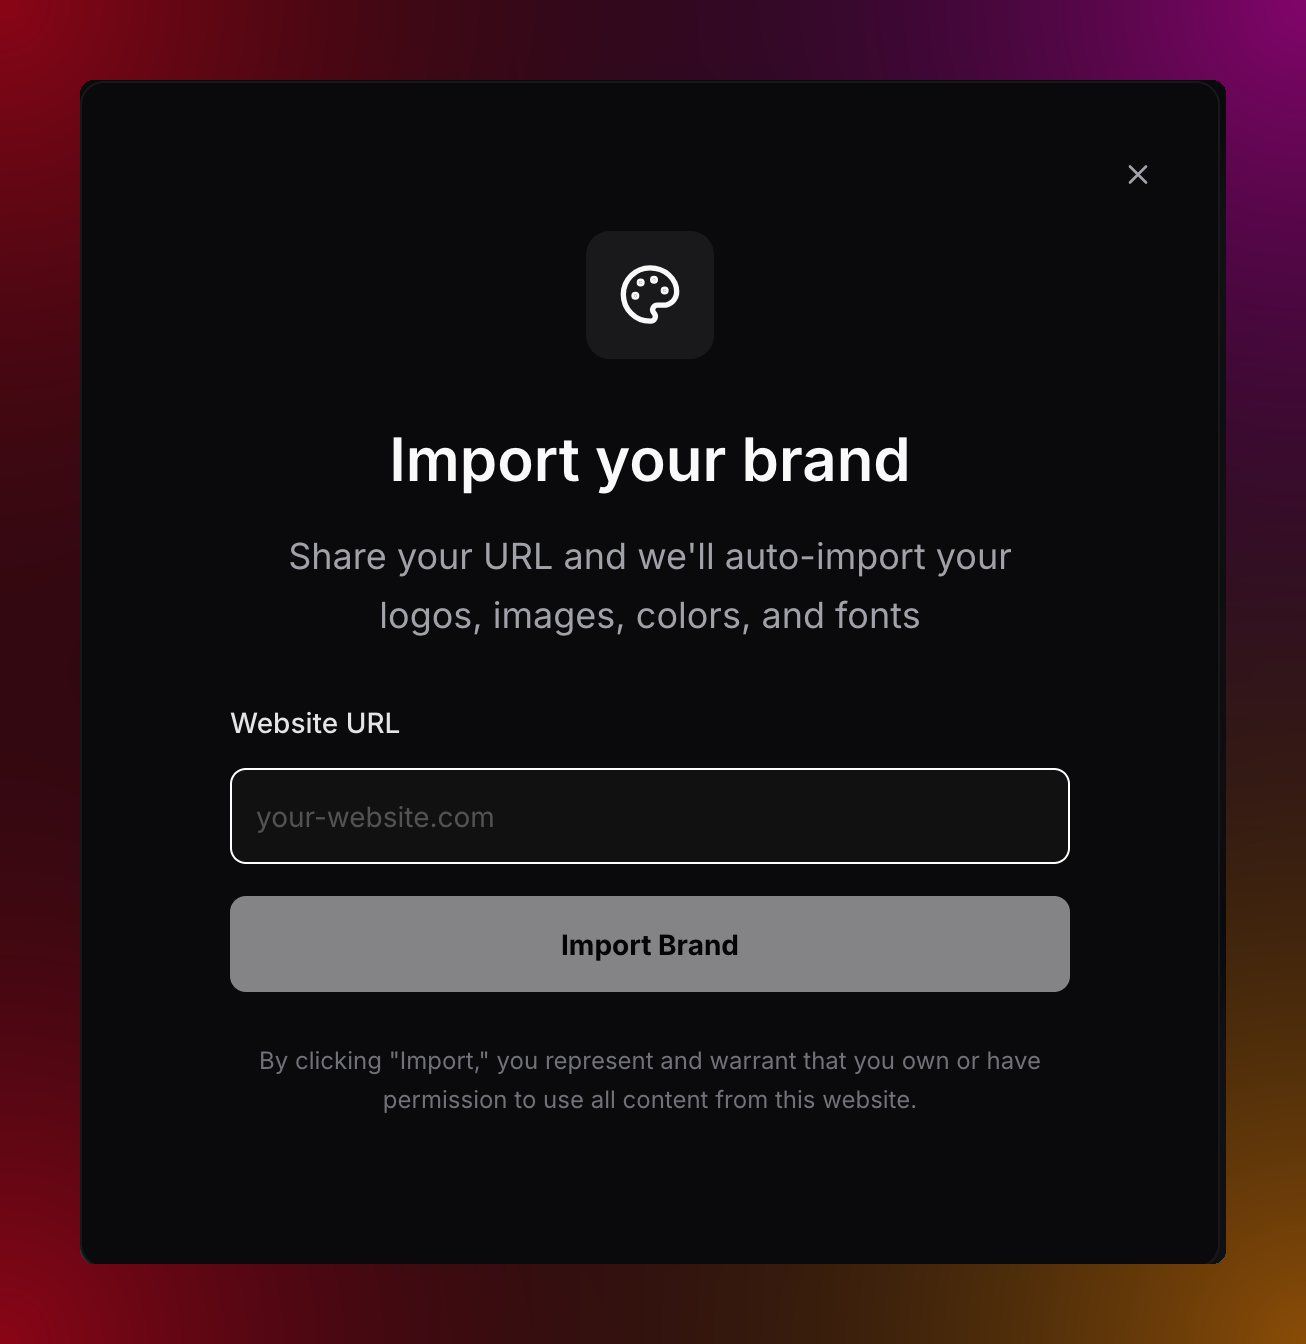
Before Migma can write emails for you, it needs to know what your brand looks like. You don't have to upload anything or fill in a form, just paste your website URL and Migma figures it out.
It reads your homepage and pulls in your logo, your colors, and your fonts. Every email it creates from that point on will look like it belongs to you.
**To import your brand:**
1. Click **My Brands** in the left sidebar
2. Hit **New Brand** on the top-right corner
3. Paste your website URL
4. Click **Import Brand**, it takes about 30 seconds
 Use your homepage, not a blog post or product page. Your homepage usually has the clearest version of your brand for Migma to read.
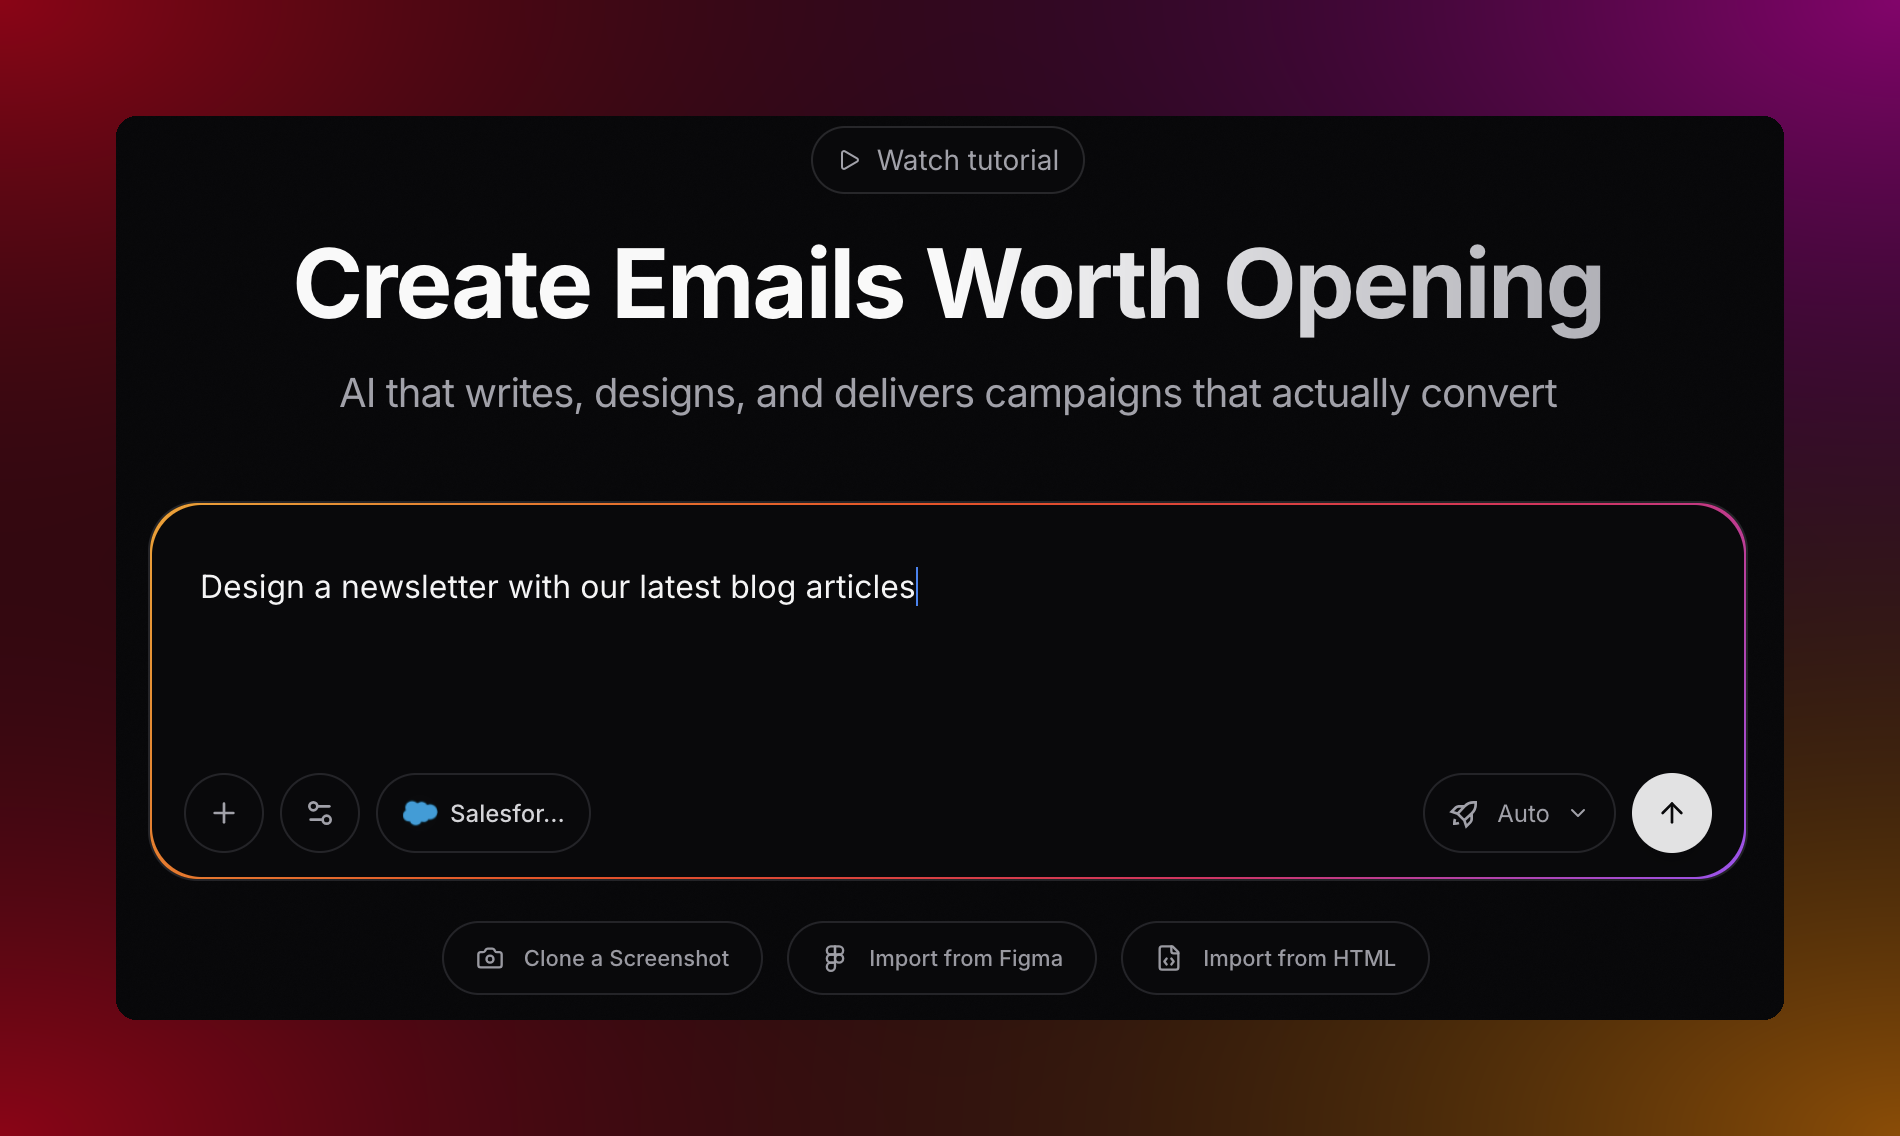
Here's where it gets good. You don't design anything, you don't write HTML, you don't even need to know what you want the email to look like. You just describe it — the way you'd explain it to someone on Slack — and Migma builds the whole thing.
**To create your first email:**
1. Click **New Email** in the left sidebar
2. Type what you want in the box
3. Hit **Enter**
Done. It usually takes about 30 seconds.
Use your homepage, not a blog post or product page. Your homepage usually has the clearest version of your brand for Migma to read.
Here's where it gets good. You don't design anything, you don't write HTML, you don't even need to know what you want the email to look like. You just describe it — the way you'd explain it to someone on Slack — and Migma builds the whole thing.
**To create your first email:**
1. Click **New Email** in the left sidebar
2. Type what you want in the box
3. Hit **Enter**
Done. It usually takes about 30 seconds.
 **Staring at a blank box?** Steal one of these:
> "Welcome email for new subscribers. Warm tone. One tip to help them get started, and a button to book a demo."
> "Black Friday sale. 30% off everything, ends Sunday midnight. Make it feel urgent. Big Shop Now button at the top."
> "Monthly newsletter. Product update, one customer story, reminder about the webinar on the 15th."
Don't overthink the prompt. Just describe what you'd want to see in the email. You can tweak the result or try again — it only takes 30 seconds either way.
Your audience is just the list of people you're going to send to. You can start with one person, even just yourself, to test things out. Import your full list whenever you're ready.
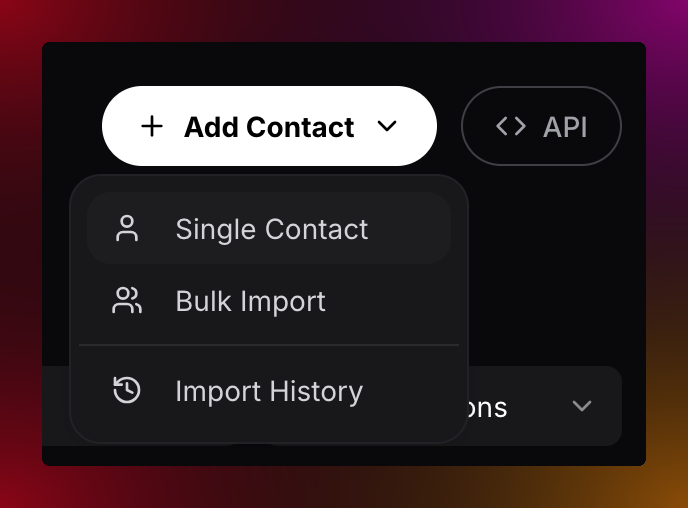
**Adding one contact:**
1. Go to **Audience** in the left sidebar
2. Click **Add Contact → Single Contact**
3. Type in a name and email address
4. Hit **Add Contact**
**Importing a list from a spreadsheet:**
1. Go to **Audience** in the left sidebar
2. Click **Add Contact → Bulk Import**
3. Upload your CSV file — Migma maps the columns for you
4. Confirm the import by proceeding further
**Staring at a blank box?** Steal one of these:
> "Welcome email for new subscribers. Warm tone. One tip to help them get started, and a button to book a demo."
> "Black Friday sale. 30% off everything, ends Sunday midnight. Make it feel urgent. Big Shop Now button at the top."
> "Monthly newsletter. Product update, one customer story, reminder about the webinar on the 15th."
Don't overthink the prompt. Just describe what you'd want to see in the email. You can tweak the result or try again — it only takes 30 seconds either way.
Your audience is just the list of people you're going to send to. You can start with one person, even just yourself, to test things out. Import your full list whenever you're ready.
**Adding one contact:**
1. Go to **Audience** in the left sidebar
2. Click **Add Contact → Single Contact**
3. Type in a name and email address
4. Hit **Add Contact**
**Importing a list from a spreadsheet:**
1. Go to **Audience** in the left sidebar
2. Click **Add Contact → Bulk Import**
3. Upload your CSV file — Migma maps the columns for you
4. Confirm the import by proceeding further
 If you just want to test the flow, add your own email address as a contact. You can bring in your real list when you're ready to send for real.
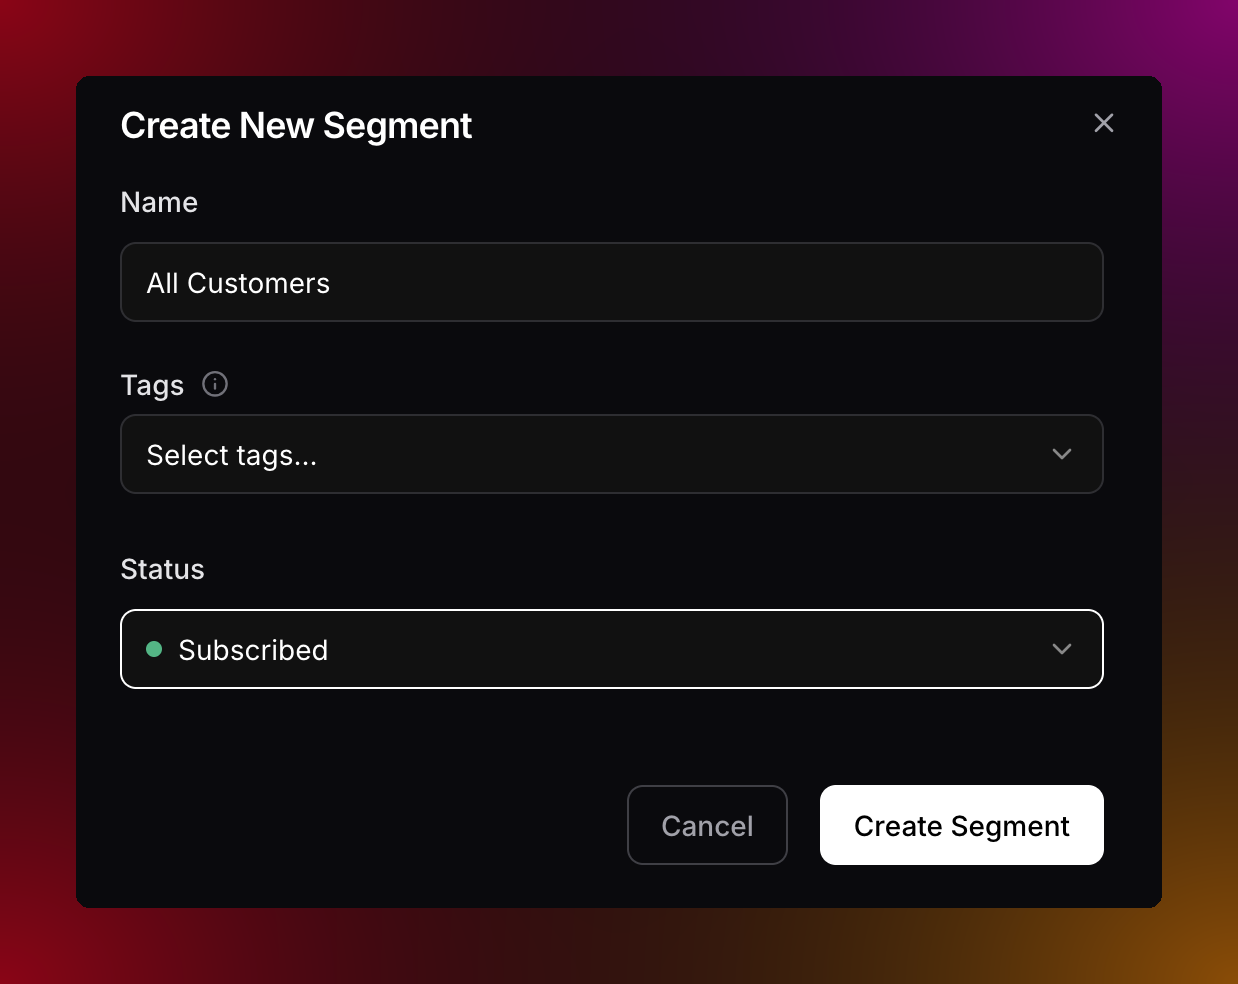
A segment is just a group of contacts that share something in common like everyone who signed up this month, or everyone tagged as a VIP customer. Instead of sending to your entire list every time, segments let you send the right email to the right people.
You don't have to get fancy with it right now. Even one simple segment is enough to send your first campaign.
**To create a segment:**
1. Go to **Audience** in the left sidebar
2. Click the **Segments** tab
3. Hit **Create Segment**
4. Give it a name something like "All customers" or "Newsletter subscribers"
5. Set your filters (or leave it open to include everyone)
6. Click **Create Segment**
If you just want to test the flow, add your own email address as a contact. You can bring in your real list when you're ready to send for real.
A segment is just a group of contacts that share something in common like everyone who signed up this month, or everyone tagged as a VIP customer. Instead of sending to your entire list every time, segments let you send the right email to the right people.
You don't have to get fancy with it right now. Even one simple segment is enough to send your first campaign.
**To create a segment:**
1. Go to **Audience** in the left sidebar
2. Click the **Segments** tab
3. Hit **Create Segment**
4. Give it a name something like "All customers" or "Newsletter subscribers"
5. Set your filters (or leave it open to include everyone)
6. Click **Create Segment**
 If you're just getting started, create one segment that includes all your contacts. You can get more specific — by tag, signup date, or activity — once you've got a few campaigns under your belt.
This step makes your emails come from your own address like [**hello@yourcompany.com**](mailto:hello@yourcompany.com) rather than a generic sender. It also makes a big difference for landing in inboxes instead of spam folders.
**To set up your domain:**
1. Click **Sending Domains** in the sidebar
2. Hit **Add Domain** on the top right corner
3. Type in your domain (like `yourcompany.com`)
4. Select the **Region** of your domain
5. Open the **DNS records** showing up and **copy** them
6. Log in to wherever you bought your domain (GoDaddy, Cloudflare, Namecheap — wherever) and paste them in
If you're just getting started, create one segment that includes all your contacts. You can get more specific — by tag, signup date, or activity — once you've got a few campaigns under your belt.
This step makes your emails come from your own address like [**hello@yourcompany.com**](mailto:hello@yourcompany.com) rather than a generic sender. It also makes a big difference for landing in inboxes instead of spam folders.
**To set up your domain:**
1. Click **Sending Domains** in the sidebar
2. Hit **Add Domain** on the top right corner
3. Type in your domain (like `yourcompany.com`)
4. Select the **Region** of your domain
5. Open the **DNS records** showing up and **copy** them
6. Log in to wherever you bought your domain (GoDaddy, Cloudflare, Namecheap — wherever) and paste them in
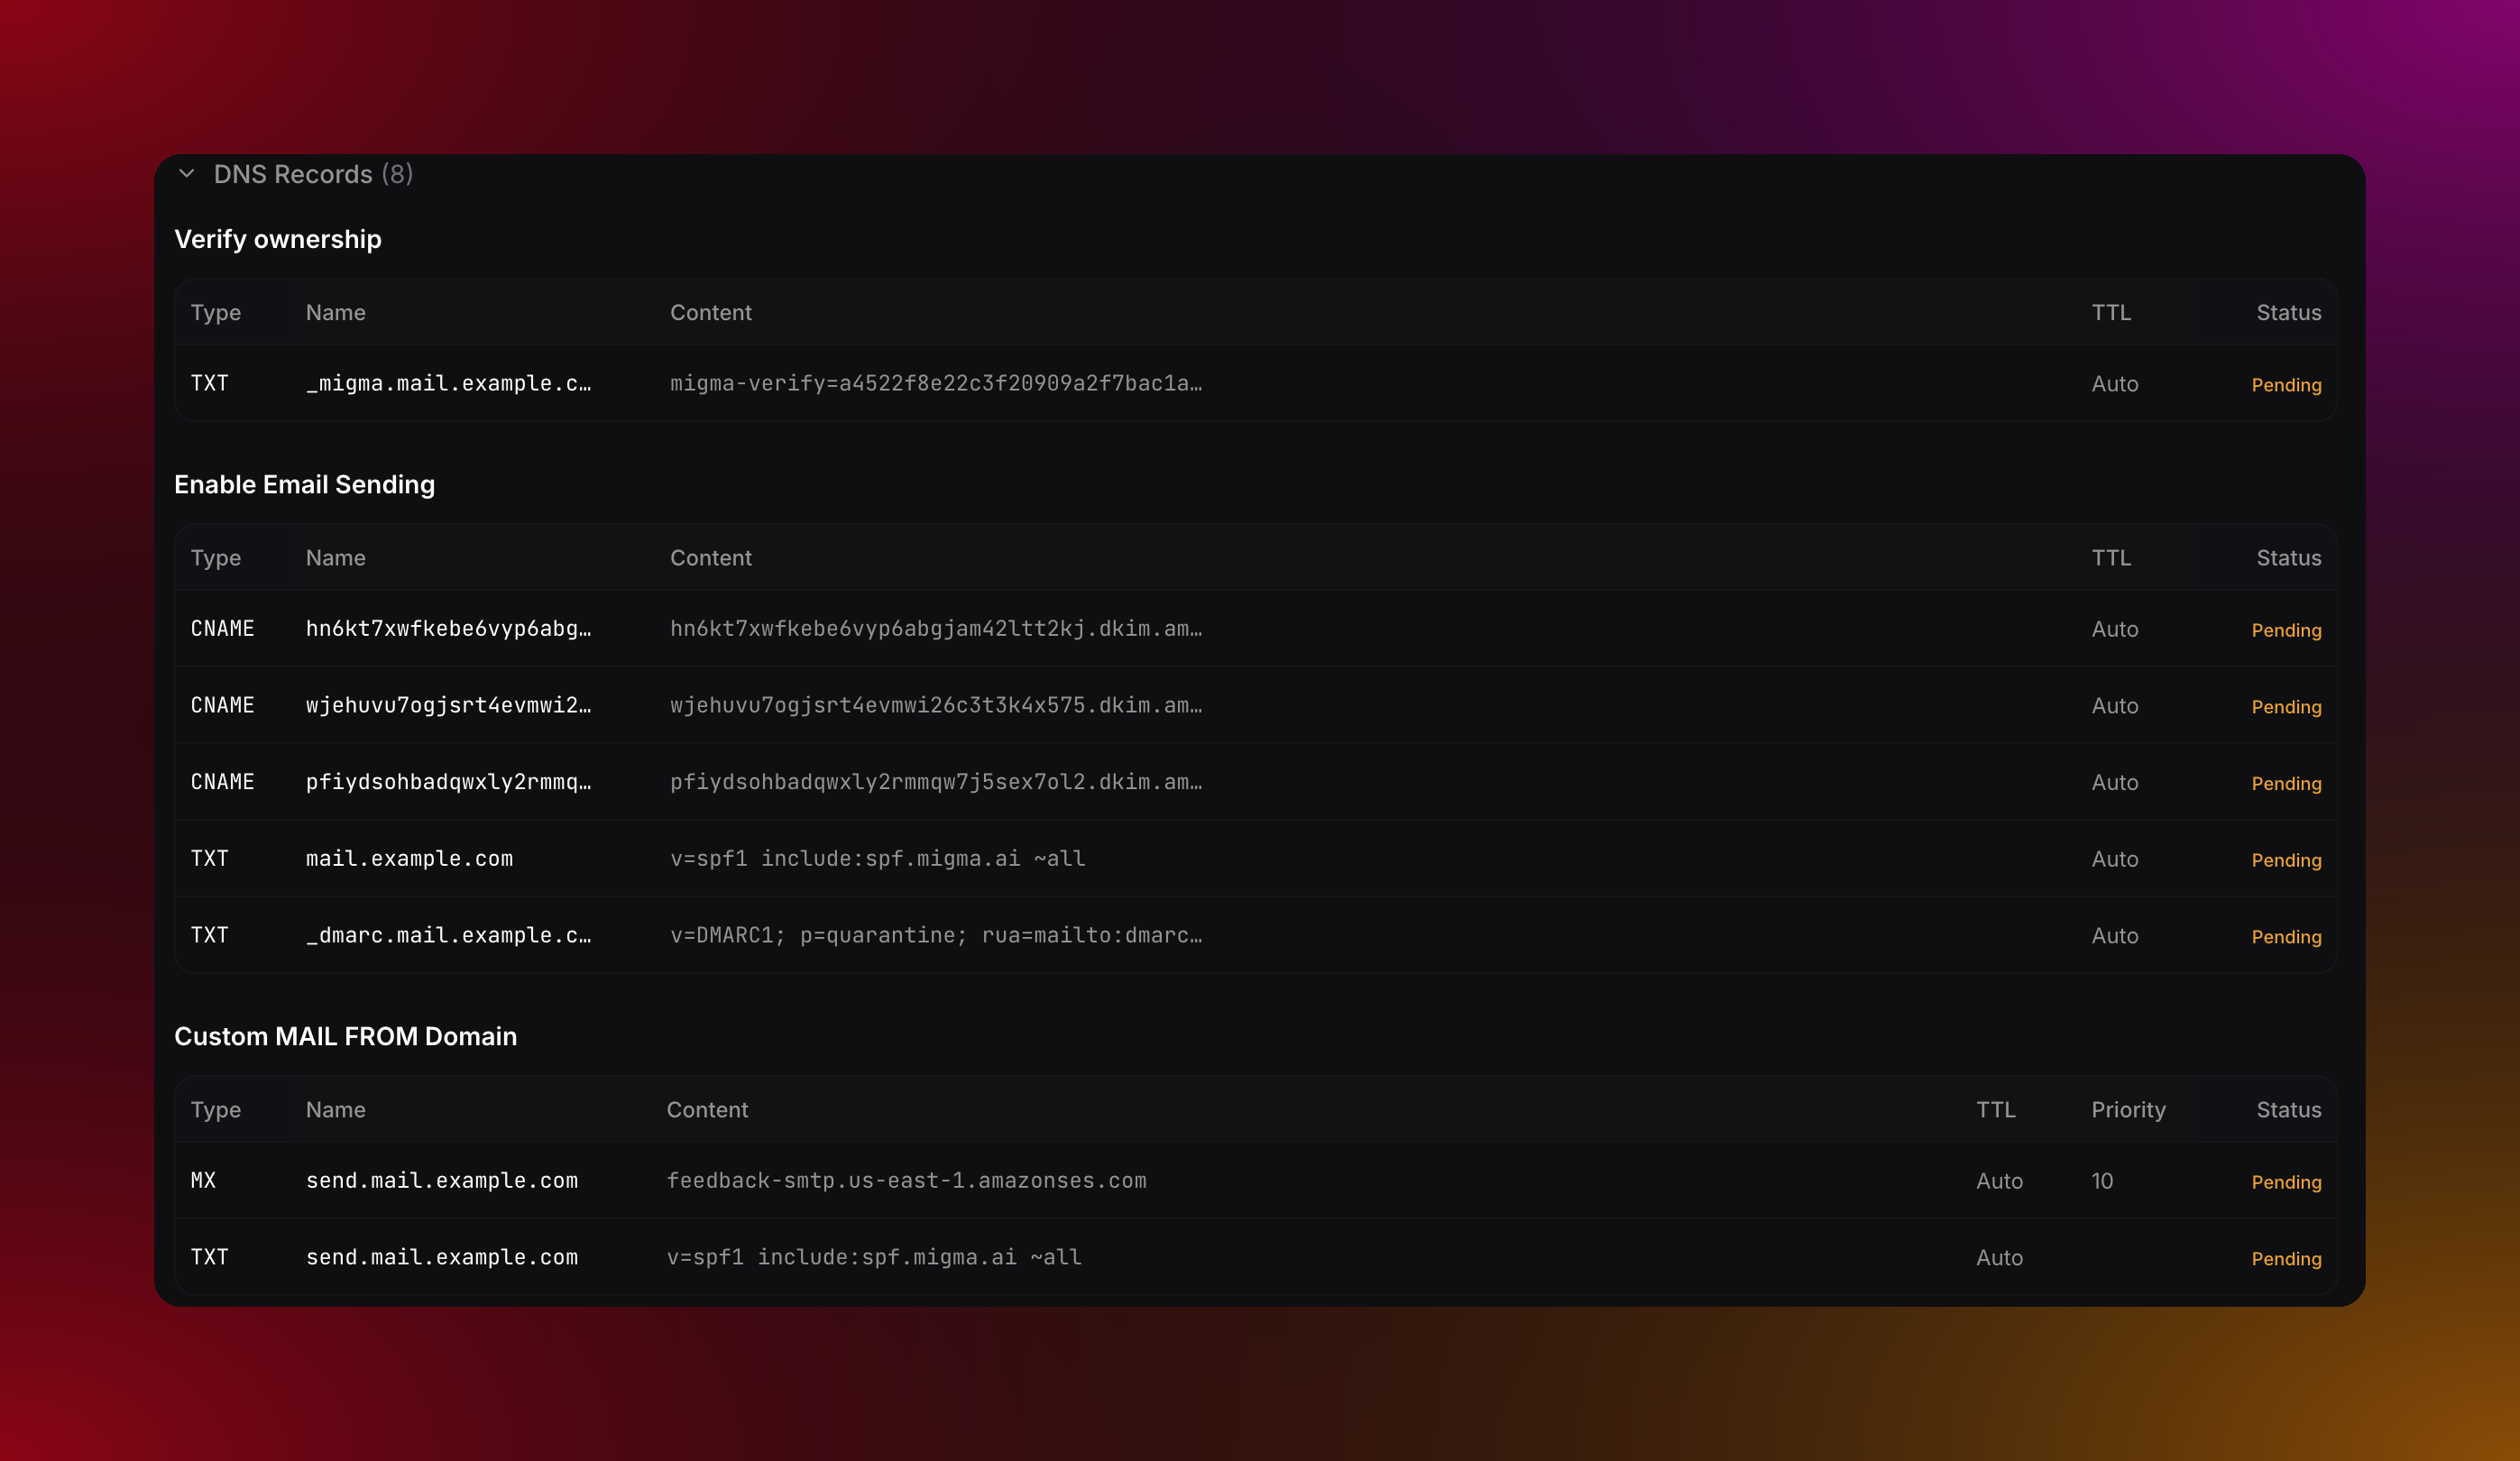 If "DNS records" means nothing to you, that's fine — it's a pretty normal thing to not know. Just copy this page's URL and send it to whoever manages your website or IT. It takes them about 10 minutes.
**Rather skip this for now?** You can. If you already use Mailchimp or Klaviyo, you can export your email there and send from your existing setup. You don't need a verified domain for that.
This is the moment. You've got an email, you've got people to send it to — let's go.
1. Click **Campaigns** in the sidebar
2. Hit **New Campaign**
3. Pick the email you made in Step 2
4. Choose the **Segment** you created in Step 4
5. Configure **Sender** and type an email to **Send** from
6. Give a **Name** to the Campaign (like `First Campaign`)
7. Click **Send Campaign** or choose a time to send it later
If "DNS records" means nothing to you, that's fine — it's a pretty normal thing to not know. Just copy this page's URL and send it to whoever manages your website or IT. It takes them about 10 minutes.
**Rather skip this for now?** You can. If you already use Mailchimp or Klaviyo, you can export your email there and send from your existing setup. You don't need a verified domain for that.
This is the moment. You've got an email, you've got people to send it to — let's go.
1. Click **Campaigns** in the sidebar
2. Hit **New Campaign**
3. Pick the email you made in Step 2
4. Choose the **Segment** you created in Step 4
5. Configure **Sender** and type an email to **Send** from
6. Give a **Name** to the Campaign (like `First Campaign`)
7. Click **Send Campaign** or choose a time to send it later
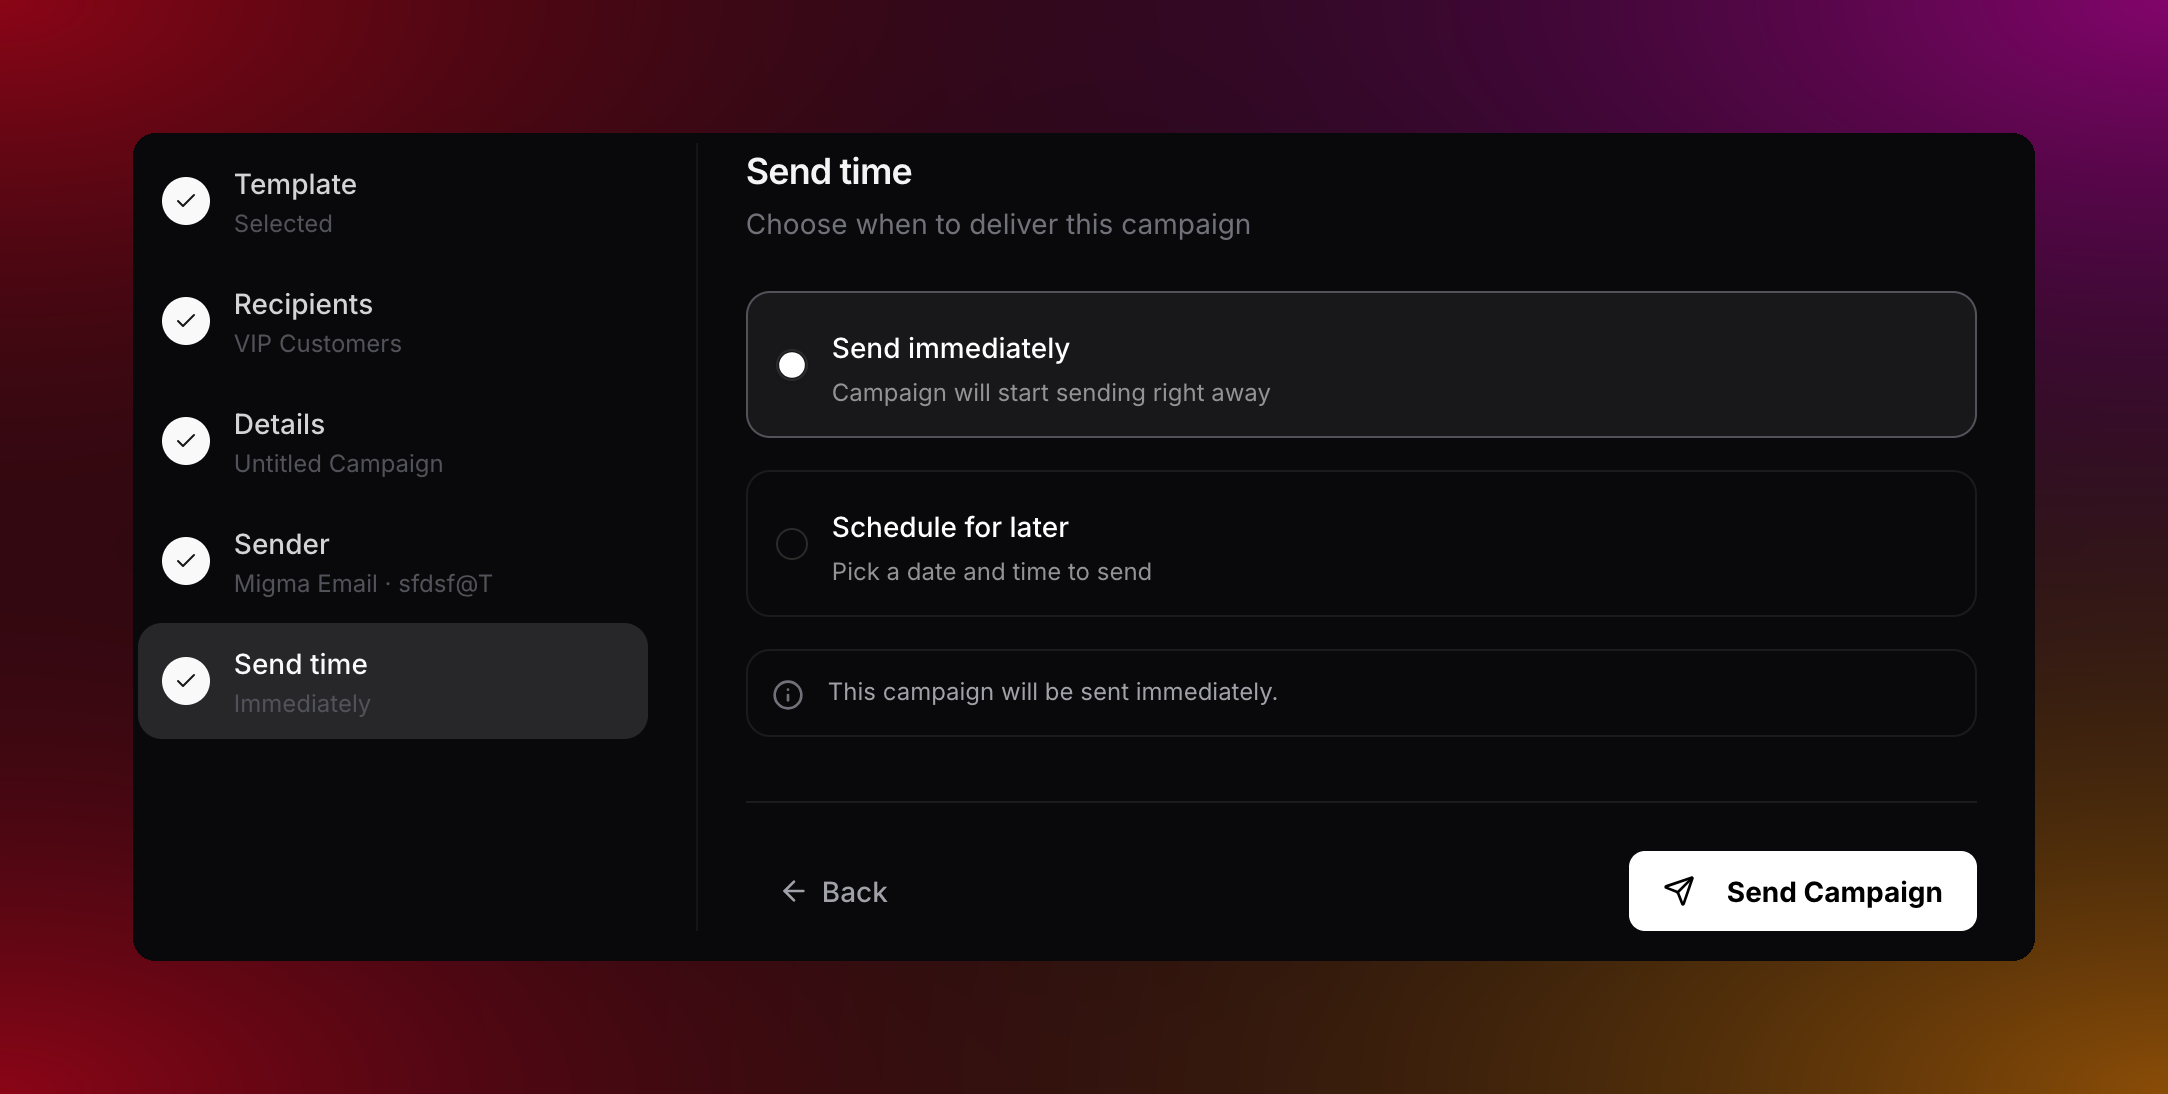
 After it goes out, you can see who opened it, who clicked, and who unsubscribed under **Campaigns**.
***
## What do you want to do next?
Clone an email you like, import a Figma design, or turn a YouTube video into a ready-to-send email.
Click into any part of your email to change text, swap images, or adjust colors. No code involved.
Group contacts into segments, add tags, and let people choose what they hear from you.
Open rates, click rates, unsubscribes — all in one place after you send.
Already on another platform? Get your Migma email into Mailchimp or Klaviyo in one click.
Generate on-brand visuals for your emails — no designer or stock photo site needed.
After it goes out, you can see who opened it, who clicked, and who unsubscribed under **Campaigns**.
***
## What do you want to do next?
Clone an email you like, import a Figma design, or turn a YouTube video into a ready-to-send email.
Click into any part of your email to change text, swap images, or adjust colors. No code involved.
Group contacts into segments, add tags, and let people choose what they hear from you.
Open rates, click rates, unsubscribes — all in one place after you send.
Already on another platform? Get your Migma email into Mailchimp or Klaviyo in one click.
Generate on-brand visuals for your emails — no designer or stock photo site needed.